Introduction
French Pain d’Epi is more than just a loaf of bread; it’s a visual and culinary masterpiece. Renowned for its striking resemblance to a stalk of wheat, this bread reflects the artistry of traditional French baking. Achieving that characteristic look involves intricate bread shaping techniques. Each loaf tells a story, connecting bakers to their heritage.
Within the realm of French baking, Pain d’Epi holds a special place. Families have passed down traditional recipes through generations, celebrating the joy of homemade bread. Crusty bread offers comfort, warmth, and nourishment. During special occasions, its beauty enhances any table décor. The process of creating each loaf is a labor of love.
Home baking has surged in popularity, with many embracing the challenge of artisan bread. Crafting a loaf from scratch not only satisfies cravings but also fosters a deeper connection to food. Utilizing a sourdough starter or quality bread flour can elevate taste and texture. Many find joy in experimenting with baking tips to perfect their craft.
As bakers immerse themselves in this flavorful journey, they discover the satisfaction of creating something unique and delicious. Pain d’Epi, in particular, invites everyone to admire not just the taste but also the artistry. Whether for family gatherings or personal enjoyment, crafting this rustic bread offers a rewarding experience.
French Pain d’Epi: An Overview
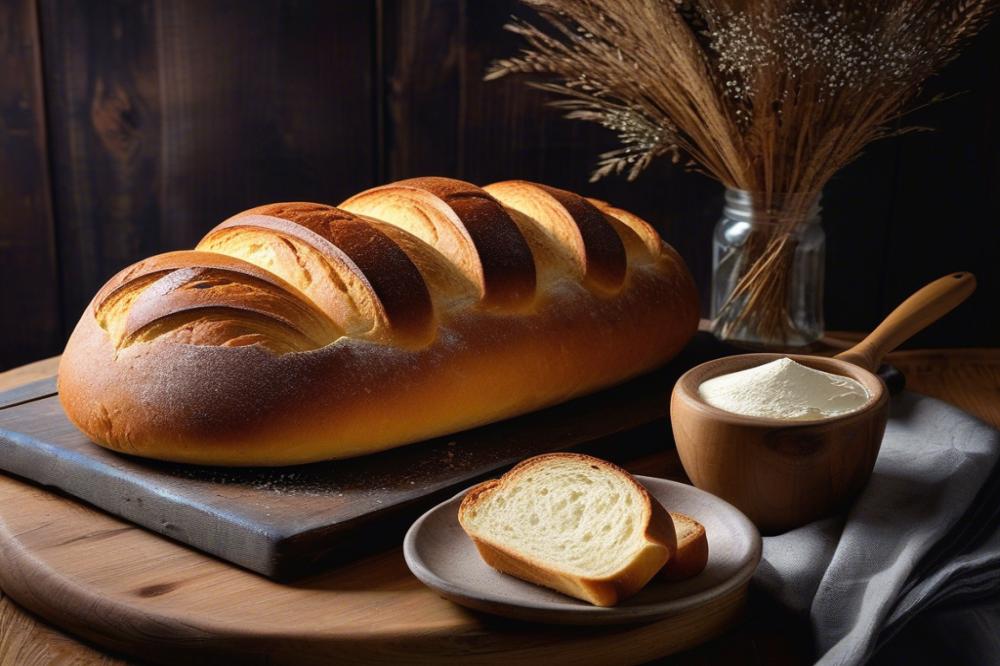
Pain d’Epi is a striking bread known for its resemblance to a wheat stalk. This crusty bread has an artistic flair that makes it a favorite in French baking. Each loaf showcases intricate designs that resemble ear of wheat, drawing attention at any table. Traditionally, it is crafted with a sourdough starter, contributing to its flavor complexity.
Historical Significance and Origin
The origins of Pain d’Epi can be traced back to France, where it has long held a special place in culinary traditions. This bread not only nourishes but also represents prosperity and abundance. In rural areas, it is often associated with harvest celebrations. The bread reflects the deep connection between agricultural practices and baking techniques in the region.
Comparison with Other Bread Types
When compared to other breads, Pain d’Epi stands out due to its specific shaping and design approach. Baguettes, for example, are long and straightforward, while Pain d’Epi uniquely combines artistry with functionality. Many other types, such as sourdough or ciabatta, may focus on texture or flavor instead of presentation. This bread brings together various qualities, making it both beautiful and delicious.
Role of Wheat Stalk Design in Presentation
The wheat stalk design serves a purpose beyond aesthetics. This feature highlights the connection to agriculture and the baker’s skill in bread shaping. As part of traditional recipes, it brings a rustic charm that enhances any meal. Guests may admire the details, making it an eye-catching centerpiece during gatherings. Home baking experiences can be enriched with such creative techniques. Experimentation with bread flour can yield satisfying results, producing loaves that are as pleasing to the eyes as to the palate.
Ingredients and Quantities
To craft delightful French pain d’épi, gathering the right ingredients is crucial. Here is a list for your baking adventure:
- Bread flour: 500g
- Water: 350ml
- Salt: 10g
- Sourdough starter: 100g
- Yeast: 5g (optional, for quicker rise)
Nutritional Information for Each Ingredient
Let’s break down the nutritional value of these ingredients. Bread flour is rich in carbohydrates and also provides a decent amount of protein. It contains fiber, which aids digestion, making it a staple in many traditional recipes.
Water, while not caloric, plays an essential role for hydration in the dough. It’s the element that brings all ingredients together, resulting in a cohesive mixture.
Salt, often overlooked, adds flavor. It also contributes sodium content, which can enhance the overall taste profile of the crusty bread.
Your sourdough starter contributes not just to the rise but also brings probiotics. These small bacteria add a depth of flavor that is hard to replicate. Using a well-fed starter is one of the baking tips for a successful loaf.
Yeast, though optional, can expedite the fermentation process. If you’re in a hurry, adding a bit can yield quicker results, ensuring you won’t wait long for that first rise. However, traditional methods rely heavily on the sourdough starter alone, which many purists prefer.
Understanding these elements is key to mastering the art of French baking. Once you have your ingredients lined up, the journey to creating beautifully shaped wheat stalk designs begins. Home baking shouldn’t feel overwhelming. Each ingredient has its role, and with practice, you can perfect your technique.
Baking Instructions
Step-by-step method to create French Pain d’Epi
Preparing the Dough: Mixing and Kneading
To start, gather your ingredients: high-quality bread flour, water, salt, and a sourdough starter. The first step involves mixing these ingredients until they form a cohesive dough. It’s essential to knead for about 10 to 15 minutes. This process develops the gluten and gives the bread structure. You can knead by hand or use a stand mixer equipped with a dough hook. Focus on achieving a smooth and elastic texture.
Fermentation: Tips for Optimal Rising
After kneading, place the dough in a lightly oiled bowl. Cover it with a damp cloth to prevent it from drying out. The resting period is critical. Allow the dough to rise for about one to two hours at room temperature, or until it doubles in size. For better flavor, consider a longer, slower fermentation in the fridge overnight. This technique amplifies the sour notes that make sourdough special.
Shaping the Loaf: Techniques for Wheat Stalk Design
Once the first rise is complete, gently punch down the dough to release any air pockets. Divide it into smaller portions for individual loaves. Now comes the fun part: shaping the appropriate design. Roll each piece into a batard (oval shape) or a boule (round shape). To create the iconic wheat stalk design, use a sharp knife or a lame. Make shallow cuts to mimic the appearance of wheat, giving it that rustic charm. It’s an artistic touch that showcases traditional baking techniques.
Baking: Temperature and Time Recommendations
Set your oven to a hot temperature of 450°F (230°C) at least 30 minutes before baking. Achieving the right environment is crucial for crusty bread. Place a baking stone inside if available, as it retains heat well. Just before putting the dough in, add steam to the oven. You can do this by placing a pan filled with hot water at the bottom. Bake for approximately 25 to 30 minutes or until the loaf reaches a golden-brown color. The internal temperature should hit about 200°F (93°C) for doneness.
Importance of Crusty Bread Texture and Flavor
Crusty bread plays a significant role in the overall experience of any loaf. A good crust adds flavor and texture, creating that satisfying crunch. The flavors develop in the oven due to the Maillard reaction, where sugars and proteins interact under heat. Consider using techniques like baking on a stone or adding steam for extra crustiness. This creates a contrast with the chewy interior, which is just delightful. Engaging with traditional recipes enriches your baking skills, making every loaf more rewarding. Happy baking!
Baking Techniques and Tips
Mastering baking techniques is key to achieving delicious results. First, understanding how to knead dough effectively will make a big difference. Kneading helps develop gluten, which adds strength and elasticity. Typically, you want to knead it for about ten minutes, or until it feels smooth and elastic. Players in the world of bread shaping know it’s important to work the dough gently, respecting the ingredients. Being too aggressive can lead to a tough loaf.
A sourdough starter is essential for flavor development. This living culture brings depth to your bread. It improves taste, offers a slight tang, and boosts the structure. Feeding your starter regularly allows it to thrive. Perhaps you’ve seen modern recipes, but traditional methods remain a reliable choice for those who appreciate classic flavors. Using high-quality bread flour can also enhance the overall quality of your dough.
When it comes to achieving that ideal crust, a few tips can make a noticeable impact. Preheating your oven is crucial; a hot start helps create steam, leading to a crisp exterior. Using a baking stone may also contribute to a more even heat distribution. Applying steam during the first few minutes of baking works wonders for crusty bread. For instance, some bakers place a pan of hot water in the oven to maintain moisture before transitioning to dry heat.
Baking tips for home enthusiasts can elevate your French baking game. Experimenting with different shapes, such as the classic wheat stalk design, adds visual appeal. A dough cutter can help create clean edges. Remember to allow the loaf to rest after shaping. This relaxation period helps the dough develop better flavors and textures. Avoid the temptation to slice before cooling; patience can result in a better crumb structure.
Mastering Bread Shaping
Shaping the Pain d’Epi is an art that requires patience and practice. Start with your dough, preferably made from a good quality bread flour. Allow the dough to rise properly after mixing your ingredients. This includes your sourdough starter if you are using one. The fermentation process is crucial for flavor and texture.
Detailed Guide to Shaping the Pain d’Epi
Once your dough has risen, divide it into equal pieces. Each piece should weigh around 250 grams. Begin by shaping each piece into a rough oval. Next, stretch the dough gently to create a long, tapered form. This is the basic structure of your wheat stalk design. Remember to handle the dough gently to retain the air bubbles, which contribute to the lightness of the bread.
Techniques for Creating the Wheat Stalk Design
To form the wheat stalk, you will need a sharp knife or a bench scraper. Make diagonal cuts along the surface of the tapered dough. These cuts should be spaced about an inch apart, extending about halfway through the dough. As you slice, angle your cuts slightly to mimic the natural look of wheat. After cutting, twist the stalk gently to enhance the effect. This motion can give your bread a more organic appearance.
Common Mistakes to Avoid When Shaping Bread
Avoid pressing too hard on the dough while shaping. Rushing the process can lead to dense bread, lacking the desired airiness. Another frequent error is neglecting the importance of rest. Allowing the shaped dough some time to relax helps improve the final result. Overworking it may lead to tough crusty bread. Additionally, be cautious not to undercut while making your design. Each slice should be deep enough to open during baking, revealing the beautiful pattern you’ve created.
Experimentation can bring delightful surprises in your home baking journey. Keep these tips at hand as you delve into the world of French baking. Focusing on these aspects will help you create a masterpiece that not only looks stunning but tastes incredible.
Final Thoughts on Mastering Bread Shaping
French Pain d’Epi holds a special place in the world of bread making. Its intricate design and rustic appeal showcase not only a delicious loaf but also the artistry involved in baking. Crafting this bread connects us to tradition and allows us to share something beautiful with others.
Experimenting with traditional recipes can lead to delightful discoveries. Don’t hesitate to add your own twists or local ingredients into the mix. Each attempt is an opportunity to learn and grow. You might even find that your interpretation of the recipe becomes a new favorite. Embrace changes and let your creativity shine through the dough.
Baking at home offers a unique comfort and satisfaction. The scent of warm, crusty bread fills your kitchen with an inviting aroma. There’s a joy in kneading the dough and watching it rise. Each step, from mixing to baking techniques, builds anticipation. When that loaf comes out of the oven, it’s a rewarding moment unlike any other.
Keep in mind that the journey of bread making is just as important as the final product. Allow yourself to enjoy the process. With practice and passion, you can create amazing loaves that bring happiness to your home. Whether it’s for family or friends, your homemade bread will surely be a cherished highlight at any gathering.

